Development from David Hockney
From the previous shoot I wanted to development this experiment further and try different techniques. My first of development was two shoots, one was of buildings in the local town centre in Leicester, I wanted to be able to catch difference angles of the building and use those images to create one image. Mean while I also took images of people portraits, I went the catching images of people of guard instead of a set up shoot because I believe this gave my image a different edge and also give my images some movement.
Both shoots were successful as I was able to captivate many angles of the building and all my images were in focus.
Shooting List
- Date: 14th April 2015
- Place: Highcross Centre, Leicester
- Time: Midday
- Lighting: N/A
- Subject: Development shoot from studying David Hockney
- Reason: To experiment with more techniques of how to apply multiple images to my own images
- Problems: N/A
- Props: N/A
How To Edit
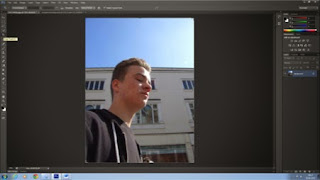
- To start editing the images I opened the same image twice in photoshop. One image will be a background maps of the placing of each of images I add to that photograph. The other photo I will use the select and cut out sections of the image to add to the background image.
- On the background image, I selected the cropped tool.
- With the cropped tool I selected a part of the image.
- After cropping the selected part of the image, I layered that image onto the background image, onto the section I wanted it placing.
- On the top tool bar I selected 'edit' to then select 'Free transform' this enabled me to change the angle of the image and also the size of the image, until I thought it was the size I wanted it to be.
- I then went back the cropped image and selected the 'edit' tool and the selected 'step backwards' this brought back the original image so I was able to crop another part of the image.
- I repeated steps 2-6 till I had completed the whole picture, to create an abstract image and also have each section of the back ground image altered. This made my image look like it is inspired by David Hockney.


Final Images
Review
After editing these images with using this new technique, comparing these edits to the last edits in the previous shoot, I believe these edits are more successful, this is because I was able complete the image without having any gaps in-between each section of the layering images. In my opinion I like the way the people edits worked out, the image looks pixelated and abstract, I also like the way the layering images causes shape edges and make the image have more of a linear factor. What I also like about the people edits is that they are full of colour which is a aspect that is included in David Hockney's work.
Further one in this assessment I hope to include this later on, my reasons for this is because I believe this is a great way to show multiple images.


No comments:
Post a Comment